- Home
- Knots and Crimping
- How to Use a Crimper
How to Use a Crimper for when Knots Just Won't Do
Knowing how to use a crimper properly is an essential skill for recreational anglers and professional long-line fisherman alike
A crimping tool is a quick, easy and secure alternative to tying knots - not in single-strand wire though, it'll slip. Guaranteed. The Haywire Twist is the only way to go in this material.
In cable or plastic-covered multi-strand wire you'll have to make crimped connections - there's no alternative.
Similarly, in heavy nylon monofilament fishing line, certainly above 100lb breaking strain, you'll have to resort to a crimped connection as the line is too inflexible for knots to be cinched up tight.
Sooner or later then, if you're tackling-up for large offshore fish, you'll need to part with a few of your hard-earned beer tokens and invest in a proper crimper tool, along with a quantity of sleeves.
A Crimper is an Essential Tool for Reliable Sleeved Connections
Regular pliers, I'm afraid, just won't do the job properly. OK, you might get away with it, but the odds are that you won't, and that 'fish-of-a-lifetime' will be lost.
A 'standard use' version of the crimper tool will get the job done if used with care, although I favour the slightly more expensive models that have a double-pivot arrangement like the one in the High Seas Rigging Kit shown below.
This provides a better mechanical advantage, requiring less force but at the same time ensures that the sleeve is fully crimped up and secure.
Why risk a poor crimped connection for the sake of a few more dollars? After all, you're only going to buy it once.
Crimping Sleeves
If all this talk of cup sizes hasn't diverted your attention to a different type of website altogether, we'll move on to sleeves.
You're going to need a selection of these - a crimp kit like the one shown below would be a good place to start, topping it up with replacement crimps as and when needed.

Take care when selecting which size sleeve to use - the leader should fit snugly inside the sleeve but be capable of being easily drawn through it, prior to completing the connection.
You can't use too small a sleeve - the leader simply won't fit - but you can go too large. Then you will have to over-crimp the sleeve to get it to hold at all, resulting in some very unreliable connections.
There are three styles of sleeves in common use - Round Section, Oval Section and Figure-of-Eight, or Double-Barrelled Section. It's worth taking a look at each of these.
Round Section Sleeves
This is clearly not the best section to snugly contain two parts of the leader, side by side.
 A round section sleeve
Round sleeves can only be compressed using a point-to-cup type of crimping tool. Unlike the cup-to-cup type crimper tool shown above, this plier-type tool has various cup shaped indentations on one jaw, and a matching series of rounded points on the other.
In use they squeeze the sleeve around the leader, but the contact made isn't uniform - even less so if the leader is crossed inside the sleeve.
 Round section sleeves could be used here in place of the figure-of-eight stopper knots
This type of sleeve results in unreliable connections and best avoided altogether in my opinion, apart from light load applications.
One such application is using a round sleeve (rather than the figure-of-eight knot shown in the sketch) on a daisy chain, where it keeps each of the teasers a set distance apart.
Artwork by Andrew Simpson
Oval Section Sleeves
 An oval sleeve is better than a round section sleeve as there's room for the tag end of the line - but it's not ideal
This section approximates more closely to that of the doubled-up leader and results in a more secure connection than a round section sleeve.
 The business end of a 'cup-to-cup' crimper
Cheap and quick to fit, this type is a firm favourite of commercial longliners, who use them by the bucketful.
A cup-to-cup crimper - as shown here - is used to compress oval sleeves.
This differs from the cup-to-point version in that both sets of indentations are concave, semi-circular cut-outs.
Double-Barrelled Sleeves
Also known as Figure-of-Eight Sleeves or Double Sleeves, these are the ones to use for the most reliable connections. Now the two parts of the leader are separate, one in each barrel of the sleeve, eliminating any possible cross-over.
 A double-barreled sleeve - definitely the way to go!
The snuggest possible fit is obtained, and the resulting connection is very secure.
These are also compressed using the cup-to-cup crimper, but it's vital that the sleeve is located correctly in the tool.
How to Use a Crimper
There are two ways of using a crimper - a right way and a wrong way!
 The wrong way The wrong way |
It's tempting to lay the sleeve in two adjacent cups on one jaw and then operate the tool. This is wrong, and won't work. |
 The right way! The right way! |
Turn the sleeve through 90° so that it is located within a single cup in each jaw, and compress it through its longest axis. |
Sleeve Material
Sleeves are usually produced in one of two materials - aluminium or copper, but nickel and less frequently brass ones are sometimes seen. Use copper ones with cable and aluminium ones with mono. Why? Well...
Cable is made of stainless steel strands. Aluminium and stainless steel are at opposite ends of the galvanic table, and aluminium being at the least noble end will corrode galvanically when immersed in seawater, much like the sacrificial anode on the underside of a boat. Not a good idea to mix these two then.
Whilst copper sleeves can be used on mono, they are more likely to cut or damage the line than aluminium ones. And you don't want that. So then, aluminium sleeves for mono and copper sleeves for cable.
Making a Sleeved Connection in Mono and
Plastic-Coated Multi-Strand Wire
First select a double-barrelled aluminium sleeve of a suitable diameter, and decide whether or not you should reinforce the loop you intend to make.
If so - and it's not a bad idea - slide a short piece of plastic rig tubing over the line before returning it through the other barrel from the opposite direction.
Alternatively, form a Flemish Eye.
If you meant to use the loop to connect to a hook or a swivel, then you should have threaded the line through the eye of the hardware before completing the loop. Hah!
For belt-and-braces security, leave - for the moment - a couple of inches or so (50mm) or so of the tag end projecting through the sleeve, and then:~
- Melt the very end of it with a cigarette lighter, and press it lightly against a hard surface to flatten it. Note: Don't do this with the plastic-covered multi-strand wire;
- Now readjust the loop to the desired size, ensuring that the flattened tag end is drawn up close to the sleeve;
- Next, take the crimping tool and select the appropriate cup, but before going any further, decide how many times you need to crimp the sleeve. For example, the 1.3mm diameter sleeves I use are 7mm long, and the 2.2mm diameter ones 13mm long;
- The jaws of the crimping tool are 4mm wide. So for the smaller ones I crimp them once, leaving flared ends of around 1.5mm at either end;
- For the larger ones, I crimp them twice, leaving similar flare ends and with a short un-crimped section in the middle of the sleeve. It's really important that you don't crimp right to the end of the sleeve, as you'd be very likely to damage the line;
- Finally, check that the sleeve is located correctly in the crimper tool then smoothly squeeze the jaws together. Job done!
Making a Sleeved Connection in Cable
This is pretty much the same process as making one in mono, other than the tag end melting bit.
Remember to use a copper or brass sleeve - definitely not an aluminium one.
It's important that you don't leave an exposed tag end in cable, as it can cause quite nasty cuts if you have to handline your catch in.
Some anglers intentionally leave a longish tag end, then contain the very end in a second sleeve. Good idea!
And you might like these...
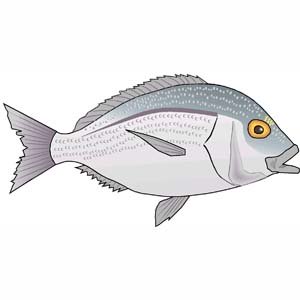
External Parts of a Fish's Anatomy in Words and Pictures
It's the tail, or caudal fin, that drives the fish forward. Other parts of a fish, the pectoral and pelvic fins for example, provide the control for closequarters manoeuvring
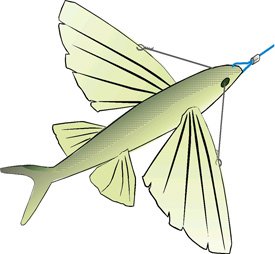
Here's The Ballyhoo Rigging Method Top Charter Captains Use
Going about ballyhoo rigging the right way is vital, or your hook-up rate will be dismal. Their beak, and elongated shape, calls for a special rigging method
Rigging Squid for Offshore Trolling with a Single Hook
This is the best way of rigging squid. Exuding a strong, oily-scented slick and with its tentacles fluttering astern of the hook, it will often catch when nothing else will
Bait Rigging A Sprat Correctly For Offshore Trolling
When bait rigging a fish for your trolling line, the golden rule is that it should wriggle, but must not spin. If you follow these instructions it will behave perfectly
Recent Articles
-
Sea Fishing Rods and Reels Must Be Compatible for a Balanced Outfit
Mar 08, 21 08:30 AM
A quality reel fitted to a quality rod doesn't necessarily make it a quality outfit. Your fishing rods and reels have to be properly matched if you're to get the best out of them, and here’s how -
Essential Lure Fishing Tips That All Saltwater Anglers Should Know
Mar 08, 21 04:51 AM
Which single lure fishing tip applies to trolling, jigging, baitcasting, spinning, fly fishing and any other branch of lure fishing? Well, it is the one at the top of this list -
Vital Jig Fishing Tips That You Really Cannot Afford To Miss!
Mar 07, 21 10:20 AM
Essential jig fishing tips to help you select the right lure for successful jig fishing, together with the techniques required to get the most out of your jig fishing outfit

FTC Disclosure: In some of the articles on this site, I endorse some items of fishing gear. If you buy something through a link, I receive a small commission with no additional cost to you. Thank you for supporting this site. It is much appreciated.


New! Comments
Have your say about what you've just read! Leave me a comment in the box below.